How to Replace an Electrical Outlet
Before starting, make sure you have the following tools and confirm the area is safe to work in:
Tools Needed
- Flat-head and Phillips screwdrivers
- Non-contact voltage tester or multimeter
- Wire strippers
- Long-nose pliers (for removing break-off tabs if needed)
- Electrical tape
- Correct replacement outlet (standard, GFCI, or tamper-resistant)
- Wire nuts for pigtailing, if needed
- Flashlight or work light
Safety Steps
- Shut off the correct breaker and verify the power is off using a tester.
- Never touch bare wires unless you’ve confirmed zero voltage.
- If wires are damaged, aluminum, or configured in a way you don’t understand, stop and call a licensed electrician.
If an outlet (commonly called a receptacle) no longer holds a plug snugly, it should be replaced. The procedure for replacing a duplex (two-outlet) wall receptacle is like that of replacing a switch. The only difference is that, depending on where the receptacle is in the wiring scheme of your house, it may have more wires attached to it than you find attached to a light switch.
Pay careful attention at the terminal screws of the new duplex receptacle. On each side of the receptacle is a pair of terminal screws. The upper screw connects to the upper outlet, and the lower screw connects to the lower outlet. A thin, metal break-off tab connects these screws. This tab enables you to attach a single wire to either screw and feed electricity to both outlets of the receptacle. If the tab is broken off, you can connect the upper and lower outlets to separate wires and control them independently.
If the receptacle is wired to the end of a series of receptacles, it usually has only two wires, and possibly a third ground wire. If it isn’t the last receptacle, two additional cables may be connected to it to carry current to the next receptacle. Just rewire the new receptacle the same way the old one was wired.
You may also wire the receptacle so that a switch controls the upper outlet, and the lower outlet is on, or hot, all the time. In this case, you need to remove the break-off tab connecting the two sets of like-colored terminals on each side of the receptacle. Otherwise, the tab remains intact, and you can see a metal bridge connecting the terminals.
The critical point to keep in mind is that hot (black or colored) wires attach to brass screws and neutral (white) wires attach to silver screws. If the unit is back-wired, the colored wires are located in the holes behind the brass screws, and the white wires in the holes behind the silver screws. If you attach a white wire to a brass screw or a colored wire to a silver screw, you may see fireworks.
To replace a standard duplex receptacle, follow these steps:
- Turn off the power to the receptacle from the main fuse or circuit panel.
- Unscrew and remove the cover plate; then use a voltage tester to make sure that the circuit is dead.
- Unscrew the receptacle from the electrical box and pull it out with the wires still attached.
Note where the white and black wires are attached to the old receptacle.
- Remove the wires.
- Carefully inspect the old receptacle to see if the break-off tab connecting the two sets of terminals on each side of the receptacle is broken off. If it is, remove the corresponding tabs from the new receptacle.
To break off the tab, grip it with long-nose pliers and bend it back and forth until it breaks off.
- Attach the wires to the new receptacle's terminals.
If the wiring has a green ground wire, attach it to the green terminal on the receptacle or to the electrical box.
- Push the new receptacle back into the electrical box and screw it in place.
- Screw on the cover plate and then turn on the power.
GFCI Outlets
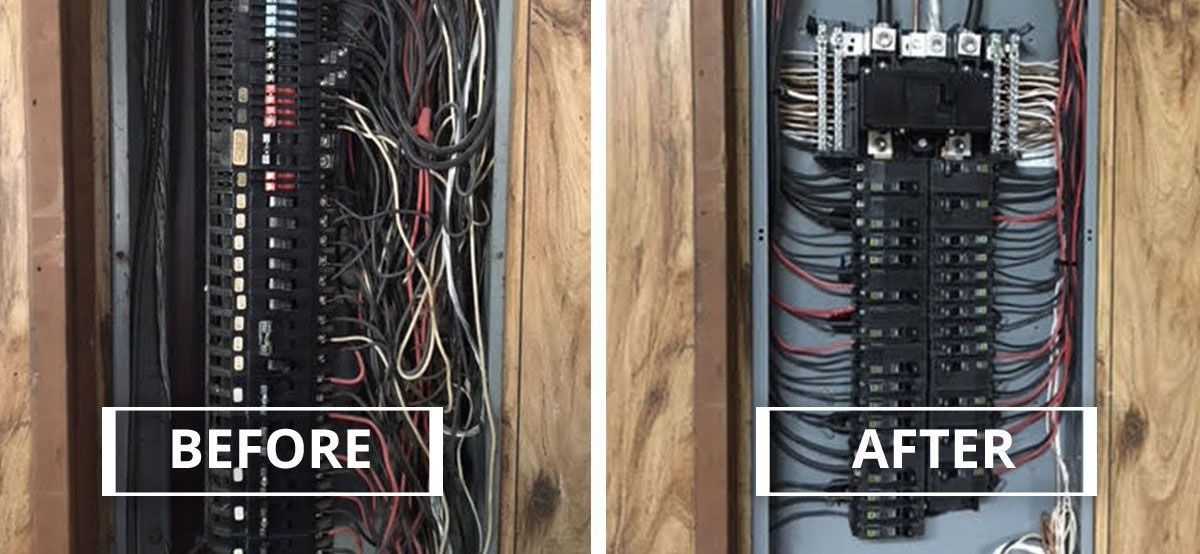
Is your wiring more than 20 years old? Consider upgrading to GFCI outlets for your next home improvement project.
This post was originally written by Joseph Truini of Today’s Homeowner
Ground-fault circuit interrupter outlets prevent accidental electrocution, and code requires them in baths, kitchens, laundry rooms, garages and outdoor locations.
How GFCI Receptacles Keep You Safe
A GFCI has a built-in circuit breaker that interrupts the flow of electricity the instant it senses a ground fault or current leak. But a GFCI won’t work unless it’s properly connected. If your electrical system has not been upgraded for 20 years or more, you probably need to install GFCIs.
Steps for a GFCI Outlet Wiring Upgrade
1. First, turn off the power to the circuit you’ll be working on.
2. Take off the cover plate and unscrew the outlet from the box. Disconnect the wires and remove the old outlet.
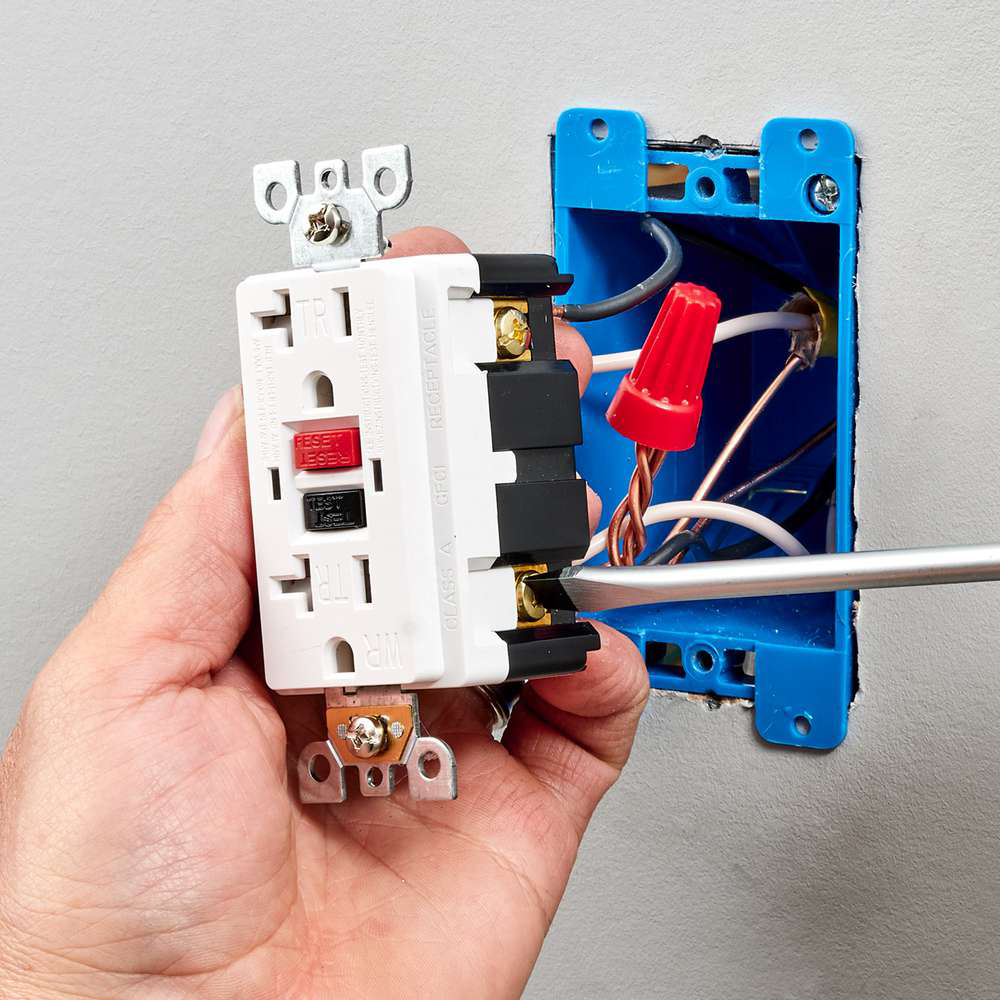
3. At the back of the GFCI are screw terminals marked “load” and “line.” The single screw at the bottom is the grounding screw.
4. Attach both the black and white wires to the screw terminals on the line side.
5. Fasten the black wire to the dark-colored screw and the white wire to the light-colored screw. Again, make sure that both wires are on the “line” side.
6. Wrap the bare copper wire around the grounding screw and tighten it.
7. Neatly tuck the wires into the box, screw the outlet in place and replace the cover plate.
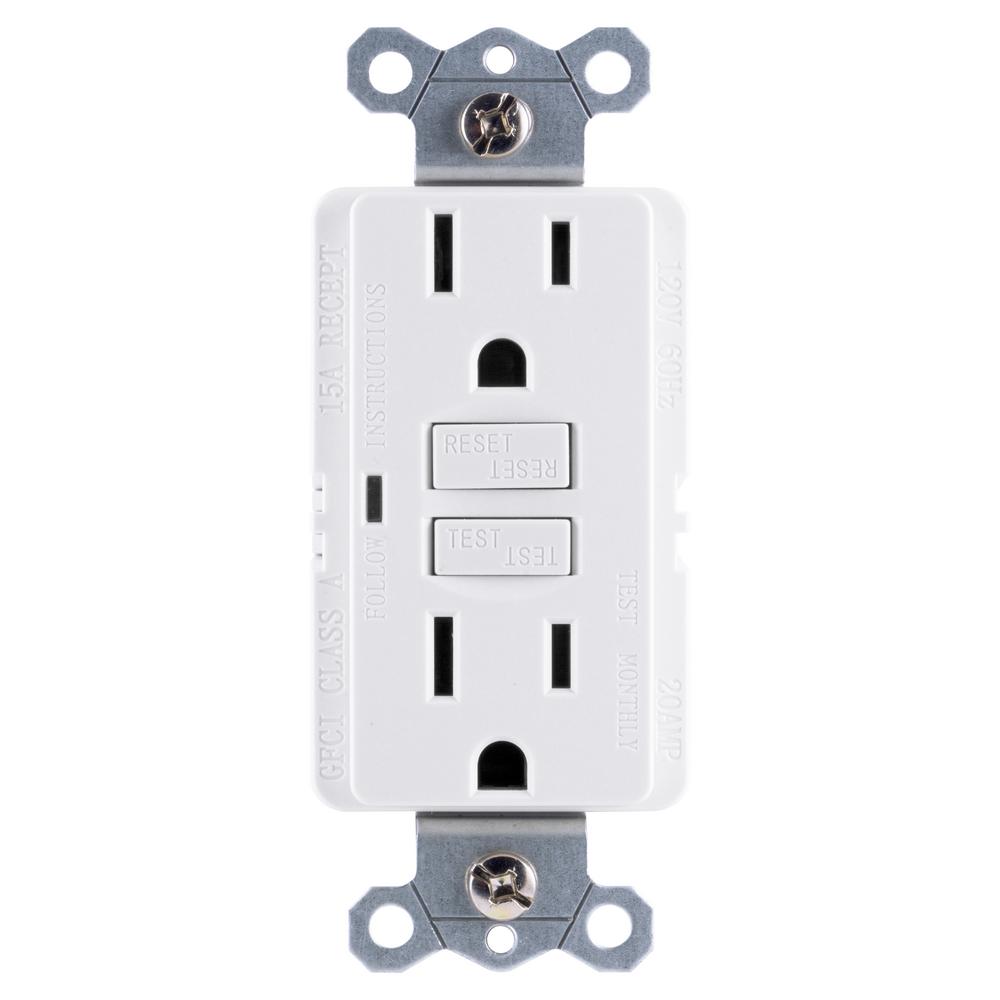
8. Finally, check the GFCI by pressing the “test” (power off) and “reset” (power on) buttons.
9. After turning off the electricity to the kitchen at the main service panel, remove the cover plate and unscrew the duplex outlet from the existing cable inside the box.
10. Install the new ground-fault circuit interrupter outlet by attaching both the black and white wires to the “line” side of the outlet.
11. Connect the bare wire to the grounding screw. Replace the cover plate, then check to make sure the GFCI is operating properly.
12. Press the test button; the outlet should go dead.
13. Reset to resume current flow.
When you pull the outlet out, you may see two, three, or even more wires. Here’s what each means:
- Hot (black or sometimes red) → connects to the brass screw
- Neutral (white) → connects to the silver screw
- Ground (green or bare copper) → connects to the green screw
If the outlet has
two sets of wires, it means it’s part of a circuit that continues to another outlet.
→ In this case, make sure to reconnect
the same way as the old outlet.
If the outlet has a
metal tab between screws on one side, that is a
break-off tab.
Do
NOT break this tab unless you're wiring:
- a split circuit, OR
- one outlet controlled by a wall switch and one always-on.
Not checking power with a voltage tester – breaker labels are often wrong.
Loose connections – always tighten screws firmly to avoid heat and arcing.
Using push-in holes (back-stab wiring) – screw terminals are safer and more durable.
Overfilled electrical boxes – too many wires can cause overheating.
Reversing polarity – hot and neutral wires must not be swapped.
Installing a 3-prong outlet without a proper ground – use a GFCI upgrade or call an electrician if the home has no grounding wire.
When to Call a Professional Electrician
Stop and call a licensed electrician if you encounter:
- Aluminum wiring (silver-colored wires)
- A warm outlet or burnt marks
- Frayed or damaged insulation
- Shared neutrals or unusual multi-wire setups
- No ground wire present in older homes
- Water exposure, corrosion, or rust in the box
AC-DC Electric has been an electrician near you for over 40 years. Call us for any electrical problems @ 970-330-1656
Do I really need a voltage tester if I shut off the breaker?
Yes. Breaker labels are often inaccurate, and circuits may be shared. A non-contact tester ensures there is zero voltage before working.
What if my outlet has no ground wire?
This is common in older homes. Do not install a standard 3-prong outlet. Instead, upgrade to a GFCI outlet or call a licensed electrician for grounding options.
Why does my outlet have two black and two white wires?
Your outlet is part of a daisy-chained circuit. Reconnect wires exactly how they were originally attached or use pigtails to clean up the wiring.
What is the break-off tab used for?
This metal tab connects the upper and lower outlets to the same power source. Break it off only if you need a split circuit or one switched outlet.
How do I know if my outlet needs to be replaced?
You should replace an outlet if it feels warm, is loose in the wall, shows burn marks, makes crackling sounds, plugs fall out easily, or it stops working intermittently. These are early signs of overheating or failing internal components.
What tools do I need to replace an electrical outlet safely?
You’ll need screwdrivers, wire strippers, a voltage tester, electrical tape, and the correct replacement outlet.
Can a loose outlet cause a fire?
Yes. Loose wires or poorly secured terminals can create heat and arcing. Always ensure connections are tight.
Can I replace an outlet with a USB outlet or smart outlet?
Yes — as long as the electrical box has enough space and wiring is standard (hot, neutral, and ground). USB and smart outlets are typically deeper, so a shallow box may need upgrading.
How long does it take to replace a standard outlet?
For most homeowners, replacement takes 10–20 minutes per outlet. If wiring is older, damaged, or confusing, it may take longer or require a professional.
Can I replace a two-prong outlet with a three-prong outlet?
Not directly. A three-prong outlet requires a ground. Your options are:
Install a GFCI outlet labeled “No Equipment Ground,” or
Have an electrician run a ground wire or upgrade wiring.
Installing a normal 3-prong outlet without a ground is unsafe and not code-compliant.
Is back-stab wiring safe?
Most electricians avoid back-stab (push-in) wiring because it can loosen over time and cause overheating. Screw terminals are more secure and recommended.
What if the outlet sparks when I plug something in?
Small “snap” sparks can be normal, but large or repeated sparks indicate a loose connection, worn contacts, or electrical damage. Stop using the outlet and replace it or call a professional.
Can I replace an outlet if wires are too short?
Yes — use pigtails (short pieces of wire) connected with wire nuts to safely extend the wires. NEVER stretch or force wires to reach the screws.
Yes — use pigtails (short pieces of wire) connected with wire nuts to safely extend the wires. NEVER stretch or force wires to reach the screws.
This usually indicates:
A short circuit
Incorrect wiring (hot/neutral reversed)
A damaged device plugged into the outlet
A weak/bad breaker
Double-check wiring or call a professional if it persists.
Do I need a permit to replace an outlet?
In most areas, replacing an outlet “like for like” does not require a permit. However, installing GFCI outlets, adding new circuits, or upgrading wiring may fall under local electrical codes.
Can I install a GFCI outlet anywhere?
Yes, but GFCIs are required in:
Kitchens
Bathrooms
Garages
Outdoors
Basements
Laundry areas
You can also protect multiple outlets downstream with one GFCI if wired correctly.
Why does my outlet have no power even after replacing it?
Common causes include:
Tripped GFCI elsewhere on the circuit
A loose wire in another outlet on the same run
A hidden junction box upstream
Breaker problems
Damaged wiring inside the wall
Start by checking all GFCI outlets in the home.
Can replacing an outlet shock me if the breaker is off?
Yes — if the circuit shares a neutral with another breaker (common in older or multi-wire branch circuits). Always test with a voltage tester, not just the breaker switch.
Should I replace old, yellowed outlets?
Yes. Yellowing often indicates age, brittleness, or heat exposure. Modern tamper-resistant outlets are safer and required in many homes.
How much does a professional electrician charge to replace an outlet?
Costs vary by location but typically range from $75–$150 per outlet, more if GFCI or wiring upgrades are required.
What is polarity and why does it matter when wiring an outlet?
Polarity ensures the proper flow of electricity. Reversing hot and neutral wires can cause shock hazards and damage electronics. Always match hot → brass, neutral → silver.
You might also like